記事内の外部リンクにはアフィリエイトリンクが含まれる場合があります。
Swiperとはなんぞやという方はこちらをご参照ください。
1. 前・次ページボタンのカスタマイズ
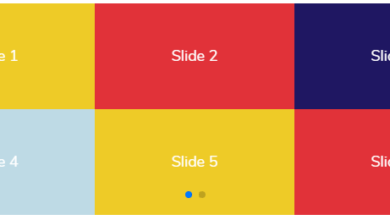
基本レイアウトはこう。
Sample.1-1
HTML
<!-- Swiper START -->
<div class="swiper">
	<!-- メイン表示部分 -->
	<div class="swiper-wrapper">
		<!-- 各スライド -->
		<div class="swiper-slide">Slide 1</div>
		<div class="swiper-slide">Slide 2</div>
		<div class="swiper-slide">Slide 3</div>
		<div class="swiper-slide">Slide 4</div>
	</div>
	<!-- 前ページボタン -->
	<div class="swiper-button-prev"></div>
	<!-- 次ページボタン -->
	<div class="swiper-button-next"></div>
</div>
<!-- Swiper END -->
JavaScript
const mySwiper = new Swiper('.swiper', {
	navigation: {
		nextEl: '.swiper-button-next',
		prevEl: '.swiper-button-prev',
	}
});
CSS(サンプル用なので初期状態は非表示にしておきます)
CSS
/* 全体のスタイル */
.swiper-wrapper {
	width: 100%;
	height: 250px;
}
/* 全スライド共通スタイル */
.swiper-slide {
	color: #ffffff;
	width: 100%;
	height: 100%;
	text-align: center;
	line-height: 250px;
}
/* 4の倍数+1枚目のスライドのスタイル(1枚目、5枚目…) */
.swiper-slide:nth-child(4n+1) {
	background-color: #EECB27;
}
/* 4の倍数+2枚目のスライドのスタイル(2枚目、6枚目…) */
.swiper-slide:nth-child(4n+2) {
	background-color: #E13239;
}
/* 4の倍数+3枚目のスライドのスタイル(3枚目、7枚目…) */
.swiper-slide:nth-child(4n+3) {
	background-color: #1F1762;
}
/* 4の倍数+4枚目のスライドのスタイル(4枚目、8枚目…) */
.swiper-slide:nth-child(4n+4) {
	background-color: #BEDAE5;
}
わからない方は基礎編参照
前・次ページへのボタンは、デフォルトだと上記のような青い< >です。
これを好きな色に変更してみます。
白にしてみる。
Sample.1-2
※HTML・JavaScriptはSample.1-1と同じ、CSSはSample.1-1に下記を追加
CSS
.swiper {
	--swiper-theme-color: #ffffff;
}
なのでライブラリ読み込み後に定義してください。
次は、デフォルトの< >を違う記号に変えてみます。
例えば、Google FontsのMaterial Symbolsを使って、
前ボタンにkeyboard_double_arrow_left、
次ボタンにkeyboard_double_arrow_rightを使うとします。
Material Symbolsを使う場合はあらかじめHTMLのHEAD部分に下記を追加。
HTML
<link rel="stylesheet" href="https://fonts.googleapis.com/css2?family=Material+Symbols+Outlined:opsz,wght,FILL,GRAD@24,400,0,0" />※HTML・JavaScriptはSample.1-1と同じ、CSSはSample.1-1に下記を追加
CSS
/* 前ページ、次ページボタン共通のスタイル */
/* 前ページボタンのスタイル */
.swiper-button-prev:after {
	font-family: "Material Icons"; /* 注:Material SymbolsではなくMaterial Icons */
	content: "\eac3"; /* keyboard_double_arrow_leftのUnicode */
}
/* 次ページボタンのスタイル */
.swiper-button-next:after {
	font-family: "Material Icons";
	content: "\eac9"; /* keyboard_double_arrow_rightのUnicode */
}Material Symbolsの一覧はこちら。
次は、ボタンを画像にする場合。
例えば、次ページへのボタンをこの画像にして、
前ページへのボタンをこれを左右反転したものにするとします。
Sample. 1-4
※HTML・JavaScriptはSample.1-1と同じ、CSSはSample.1-1に下記を追加
CSS
/* ボタンのサイズ(高さ) */
.swiper {
	--swiper-navigation-size: 48px;
}
/* 次ページボタンのスタイル */
.swiper-button-next:after {
	content: url(画像アドレス);
}
/* 前ページボタンのスタイル */
.swiper-button-prev:after {
	content: url(画像アドレス);
	transform: scale(-1, 1); /* 左右反転 */
}2. ページネーションのカスタマイズ
bulletsタイプ
bulletタイプの基本はこう。Sample. 2-1-1
HTML
<!-- Swiper START -->
<div class="swiper">
	<!-- メイン表示部分 -->
	<div class="swiper-wrapper">
		<!-- 各スライド -->
		<div class="swiper-slide">Slide 1</div>
		<div class="swiper-slide">Slide 2</div>
		<div class="swiper-slide">Slide 3</div>
		<div class="swiper-slide">Slide 4</div>
		<div class="swiper-slide">Slide 5</div>
		<div class="swiper-slide">Slide 6</div>
		<div class="swiper-slide">Slide 7</div>
		<div class="swiper-slide">Slide 8</div>
	</div>
	<!-- ページネーション -->
	<div class="swiper-pagination"></div>
</div>
<!-- Swiper END -->
JavaScript
const mySwiper = new Swiper('.swiper', {
	pagination: {
		el: '.swiper-pagination',
		type: 'bullets',
		clickable: true,
	}
});さて、これもデフォルトでは青丸ですが、色を変えてみます。
白に変更。
Sample. 2-1-2
※HTML、JavaScriptはSample.2-1-1、CSSはSample.1-1に下記を追加
CSS
.swiper {
	--swiper-theme-color: #ffffff;
}スタイルシートで色や大きさをいじってみたサンプルがこちら。
Sample. 2-1-3
※HTML、JavaScriptはSample.2-1-1と同じ、CSSはSample.1-1に下記を追加
CSS
/* 全体のスタイル */
.swiper-pagination-bullet {
	width: 12px; /* 幅 */
	height: 12px; /* 高さ */
	background: #9acd32; /* 色:緑 */
	opacity: 0.5; /* 半透明(デフォルトでは0.2) */
}
/* 現在のスライドのスタイル */
.swiper-pagination-bullet-active {
	width: 20px; /* 幅 */
	height: 20px; /* 高さ */
	background: #ffd700; /* 色:黄色 */
	opacity: 1; /* 不透明 */
}Sample. 2-1-4
※HTML、JavaScriptはSample.2-1-1と同じ、CSSはSample.1-1に上記を追加
CSS
/* 全体のスタイル */
.swiper-pagination-bullet {
	width: 16px;
	height: 16px;
	border-radius: 0%;
	background: url(星の画像のURL);
	opacity: 0.5;
}
/* 現在のスライドのスタイル */
.swiper-pagination-bullet-active {
	width: 32px;
	height: 32px;
	background: url(ハートの画像のURL);
}パラメータ追加で、スライド数が多い時に ○ ● ● ● … を全部表示せず、現在のページ付近以外を省略するように表示することもできます。
Sample. 2-1-5
JavaScript
const mySwiper = new Swiper('.swiper', {
	pagination: {
		el: '.swiper-pagination',
		type: 'bullets',
		clickable: true,
		dynamicBullets: true,
		dynamicMainBullets: 1,
	}
});パラメータ解説
| パラメータ | 取り得る値 (省略時は赤字) | 備考 |
|---|---|---|
| dynamicBullets | true | 現在のスライド付近以外の ● を省略する |
| false | すべての ● を表示する | |
| dynamicMainBullets | 1等の数値 | dynamicBulletsがtrueの時、大きく表示する ● の数。増やすと表示される ● の全体数が増える (例)1の時: ● ● ● ● ● 3の時: ● ● ● ● ● ● ● |
Sample. 2-1-6
JavaScript
const mySwiper = new Swiper('.swiper', {
	pagination: {
		el: '.swiper-pagination',
		type: 'bullets',
		clickable: true,
		dynamicBullets: true,
		dynamicMainBullets: 3
	}
});CSS
/* ベースのスタイル */
.swiper-pagination-bullet {
	width: 20px; /* 最も大きい●の幅 */
	height: 20px; /* 最も大きい●の高さ */
	opacity: 0.5; /* 透明度 */
}
/* 最も大きい●のスタイル */
.swiper-pagination-bullets-dynamic .swiper-pagination-bullet-active-main {
	background: #56aaff; /* 青 */
	opacity: 0.8;
}
/* 現在のスライドのスタイル */
.swiper-pagination-bullets-dynamic .swiper-pagination-bullet-active {
	background: #56ffff; /* 水色 */
	opacity: 1; /* 不透明 */
}
/* 最も大きい●の一つ前のスライドのスタイル(二番目に大きい●) */
.swiper-pagination-bullets-dynamic .swiper-pagination-bullet-active-prev {
	background: #aa56ff; /* 紫 */
	opacity: 0.6;
}
/* 最も大きい●の二つ前のスライドのスタイル(一番小さい●) */
.swiper-pagination-bullets-dynamic .swiper-pagination-bullet-active-prev-prev {
	background: #ff56aa; /* ピンク */
}
/* 最も大きい●の一つ次のスライドのスタイル(二番目に大きい●) */
.swiper-pagination-bullets-dynamic .swiper-pagination-bullet-active-next {
	background: #56ff56; /* 緑 */
	opacity: 0.6;
}
/* 最も大きい●の二つ次のスライドのスタイル(一番小さい●) */
.swiper-pagination-bullets-dynamic .swiper-pagination-bullet-active-next-next {
	background: #ffff56; /* 黄色 */
}作ってみて始めて知りましたが、現在のスライドはdynamicMainBulletsで指定した一番大きい ● の中央に表示されるとは限らないんですね。
応用編。
下記のようにすると、さらに変わった書式を設定できます。
Sample. 2-1-7
JavaScript
const mySwiper = new Swiper('.swiper', {
	pagination: {
		el: '.swiper-pagination',
		type: 'bullets',
		clickable: true,
		renderBullet: function (index, className) {
			//中に数字を表示
			return '<span class="' + className + '">' + (index + 1) + '</span>';
		}
	}
});
パラメータ解説
| パラメータ | 取り得る値 (省略時は赤字) | 備考 |
|---|---|---|
| renderBullet | type: 'bullets'時にページネーションの書式を設定する function(index, className) { … } |
indexは0から始まることに注意(1枚目:0、2枚目:1、…)。
※HTMLはSample.2-1-1と同じ、CSSはSample.1-1に下記を追加
CSS
/* 全体のスタイル */
.swiper-pagination-bullet {
	width: 16px;
	height: 16px;
	background: #ffffff;
	opacity: 0.5;
	color: #000000;
	font-size: 12px;
	line-height: 16px;
}
/* 現在のスライドのスタイル */
.swiper-pagination-bullet-active {
	background-color: #000000;
	color: #ffffff;
}
fractionタイプ
次はfractionです。fractionタイプの基本はこう。
Sample. 2-2-1
JavaScript
const mySwiper = new Swiper('.swiper', {
	pagination: {
		el: '.swiper-pagination',
		type: 'fraction',
	}
});
文字色やサイズを変更したいときは、.swiper-paginationに対して設定を行えばOK。
CSS
.swiper-pagination {
	font-size: 12px; /* サイズ */
	color: #ffffff; /* 文字色 */
}Sample. 2-2-2
JavaScript
const mySwiper = new Swiper('.swiper', {
	pagination: {
		el: '.swiper-pagination',
		type: 'fraction',
		renderFraction: function (currentClass, totalClass) {
			return '<span class="' + totalClass + '"></span>' + ' ページ中 ' + '<span class="' + currentClass + '"></span>' + ' ページ目';
		}
	}
});
パラメータ解説
| パラメータ | 取り得る値 (省略時は赤字) | 備考 |
|---|---|---|
| renderFraction | type: 'fraction'時にページネーションの書式を設定する function (currentClass, totalClass) { … } |
CSS
/* 全体のスタイル */
.swiper-pagination-fraction {
	color: #ffffff;
	font-size: 14px;
}
/* 総スライド数のスタイル */
.swiper-pagination-total {
	color: #ff00ff;
}
/* 現在のスライド番号のスタイル */
.swiper-pagination-current {
	color: #00bfff;
	font-weight: bold;
}
progressbarタイプ
progressbarタイプの基本はこう。Sample. 2-3-1
JavaScript
const mySwiper = new Swiper('.swiper', {
	pagination: {
		el: '.swiper-pagination',
		type: 'progressbar',
	}
});スタイルシートで大きさや色を変えてみるとこんな感じ。
Sample. 2-3-2
CSS
.swiper-pagination-progressbar {
	height: 20px; /* プログレスバーの高さ */
	background: rgba(255, 255, 255, 0.5); /* 背景色:白・半透明 */
}
.swiper-pagination-progressbar-fill {
	background: #ffb6c1; /* 塗りつぶし:ピンク */
}プログレスバーの方向を変えるパラメータもあります。
Sample. 2-3-3
※HTMLはSample.2-1-1、CSSはSample.1-1と同じ
JavaScript
const mySwiper = new Swiper('.swiper', {
	pagination: {
		el: '.swiper-pagination',
		type: 'progressbar',
		progressbarOpposite: true,
	}
});
パラメータ解説
| パラメータ | 取り得る値 (省略時は赤字) | 備考 |
|---|---|---|
| progressbarOpposite | true | type: 'progressbar'の時のみ有効。横方向のスライドに縦方向のプログレスバー、縦方向のスライドに横方向のプログレスバーを表示 |
| false | スライドの移動方向と同じ向きのプログレスバーを表示 |
応用編。
さらに細かく書式を設定したい時。
Sample. 2-3-4
※HTMLはSample.2-1-1、CSSはSample.1-1+Sample.2-3-2と同じ
JavaScript
const mySwiper = new Swiper('.swiper', {
	pagination: {
		el: '.swiper-pagination',
		type: 'progressbar',
		renderProgressbar: function (progressbarFillClass) {
			return '<span class="' + progressbarFillClass + '"><div style="display:inline-block; position:absolute; left:0; bottom:0; width:100%; height:10px; background:#ffffff;"></div></span>';
		}
	}
});
パラメータ解説
| パラメータ | 取り得る値 (省略時は赤字) | 備考 |
|---|---|---|
| renderProgressbar | type: 'progressbar'の時にページネーションの書式を設定する。 function (progressbarFillClass) { … } |
下半分の白いラインをrenderProgressbarの中で作っています。
customタイプ
bulletsでもfractionでもprogressbarでもない、違う書式にしたいときはtype: 'custom'にします。renderCustomもセットで設定する必要があります。
Sample. 2-4
JavaScript
const mySwiper = new Swiper('.swiper', {
	pagination: {
		el: '.swiper-pagination',
		type: 'custom',
		renderCustom: function (swiper, current, total) {
			if (swiper.isBeginning) {
				//1枚目
				return 'はじまりはじまり~';
			} else if (current == 2) {
				//2枚目
				return 'このスライドの幅は' + swiper.width + 'です';
			} else if (current == 3) {
				//3枚目
				return 'このスライドの高さは' + swiper.height + 'です';
			} else if (current == 4) {
				//4枚目
				return '<span style="color:#000000;">スライドの向きは' + swiper.params.direction + 'です</span>';
			} else if (current == 5) {
				//5枚目
				return 'たまには普通に表示。
' + current + ' / ' + total;
			} else if (current == 7) {
				//7枚目
				return 'ページネーションのtypeは' + swiper.params.pagination.type + 'ですね?';
			} else if (current == total) {
				//最後のスライド
				return 'めでたしめでたし';
			} else {
				//上記以外(6枚目)
				return '最初のスライドじゃないよ';
			}
		}
	}
});
パラメータ解説
| パラメータ | 取り得る値 (省略時は赤字) | 備考 |
|---|---|---|
| renderCustom | type: 'custom'時にページネーションの書式を設定する。 function (swiper, current, total) { … } |
このサンプルでは幅や高さを表示するぐらいのことしかしていませんが、Swiperのパラメータも参照できます。
※HTMLはSample.2-1-1と同じ、CSSはSample.1-1に上記を追加
CSS
.swiper-pagination-custom {
	color: #ffffff;
	font-size: 13px;
}
3. スクロールバーのカスタマイズ
基本のスクロールバーはこんな感じ。
Sample. 3-1
HTML
<!-- Swiper START -->
<div class="swiper">
	<!-- メイン表示部分 -->
	<div class="swiper-wrapper">
		<!-- 各スライド -->
		<div class="swiper-slide">Slide 1</div>
		<div class="swiper-slide">Slide 2</div>
		<div class="swiper-slide">Slide 3</div>
		<div class="swiper-slide">Slide 4</div>
	</div>
	<!-- スクロールバー -->
	<div class="swiper-scrollbar"></div>
</div>
<!-- Swiper END -->
JavaScript
const mySwiper = new Swiper('.swiper', {
	scrollbar: {
		el: '.swiper-scrollbar',
		draggable: true,
	}
});これをスタイルシートで色やサイズを変えたサンプルはこうなります。
Sample. 3-2
CSS
.swiper-scrollbar {
	height: 25px; /* 高さ */
	background: rgba(230, 255, 85, 0.3); /* 背景色(現在のスライド以外) */
	border-radius: 50px; /* 丸み */
}
.swiper-scrollbar-drag {
	background: rgba(230, 255, 85, 0.7); /* 背景色(現在のスライド) */
	border-radius: 50px; /* 丸み */
}4. 全部付けてみる
そのまま全部足せばOK。
色・サイズの変更方法はこれまでのサンプルと同じ。
Sample. 4
HTML
<!-- Swiper START -->
<div class="swiper">
	<!-- メイン表示部分 -->
	<div class="swiper-wrapper">
		<!-- 各スライド -->
		<div class="swiper-slide">Slide 1</div>
		<div class="swiper-slide">Slide 2</div>
		<div class="swiper-slide">Slide 3</div>
		<div class="swiper-slide">Slide 4</div>
	</div>
	<!-- 前ページボタン -->
	<div class="swiper-button-prev"></div>
	<!-- 次ページボタン -->
	<div class="swiper-button-next"></div>
	<!-- ページネーション -->
	<div class="swiper-pagination"></div>
	<!-- スクロールバー -->
	<div class="swiper-scrollbar"></div>
</div>
<!-- Swiper END -->
JavaScript
const mySwiper = new Swiper('.swiper', {
	navigation: {
		nextEl: '.swiper-button-next',
		prevEl: '.swiper-button-prev',
	},
	pagination: {
		el: '.swiper-pagination',
		type: 'bullets',
		clickable: true
	},
	scrollbar: {
		el: '.swiper-scrollbar',
		draggable: true,
	}
});全部つけた状態でテーマカラーを変更すると次のようになります。
白に変更。
Sample. 4-1
CSS
.swiper {
	--swiper-theme-color: #ffffff;
}
5. 各ナビゲーションをスライドの外側に配置する
前ページ・次ページボタン、ページネーション、スクロールバーはデフォルトだとスライドの中に表示されます。
場合によってはコンテンツを隠してしまうので、スライドの外側に配置するには下記のようにします。
Sample. 5
HTML
<div class="swiper-parent">
	<!-- Swiper START -->
	<div class="swiper">
		<!-- メイン表示部分 -->
		<div class="swiper-wrapper">
			<!-- 各スライド -->
			<div class="swiper-slide">Slide 1</div>
			<div class="swiper-slide">Slide 2</div>
			<div class="swiper-slide">Slide 3</div>
			<div class="swiper-slide">Slide 4</div>
		</div>
		<!-- ページネーション -->
		<div class="swiper-pagination"></div>
		<!-- スクロールバー -->
		<div class="swiper-scrollbar"></div>
	</div>
	<!-- Swiper END -->
	<!-- 前ページボタン -->
	<div class="swiper-button-prev"></div>
	<!-- 次ページボタン -->
	<div class="swiper-button-next"></div>
</div>CSS
/* Swiperの親要素 */
.swiper-parent {
	position: relative;
}
/* Swiper本体 */
.swiper {
	width: calc(100% - 100px);	/* ☆前・次ページボタンの幅をそれぞれ50pxとして、その分を引く */
	padding-bottom: 50px;		/* ★ページネーション+スクロールバー分の余白50pxを下に取る */
	box-sizing: content-box;
}
/* 前・次ボタンの縦位置調整(スライドの高さの中央に合わせる) */
.swiper-button-prev, .swiper-button-next {
	top: calc((100% - 50px) * 0.5);	/* ☆★ページネーション+スクロールバー(50px)を除く縦位置の中央(=スライドの高さの中央)に一旦配置 */
	margin-top: -22px;			/* ★ボタンの高さ(44px)の半分のネガティブマージンで上に少しずらす */
}
☆の項目は、前・次ボタンを使用しないときは設定不要。
★の項目は、ページネーション・スクロールバーを使用しないときは不要。
色やサイズの変更は、これまでのサンプルと同様です。
前・次ボタンの縦位置調整について補足。
top: calc((100% - 50px) * 0.5) というのは、メイン表示部のtop: 50%の位置にあたります。
これだけを指定した状態だと、前ボタンとメイン表示部の位置関係は
こんな感じ。
縦中央位置がそろっていません。
margin-top: -(ボタンの高さの半分)pxも設定すると
となります。
メイン表示部とボタンの縦中央位置をそろえるために、ネガティブマージンを追加しています。
6. 縦方向のスライドにするとどうなるか
Sample. 6-1
JavaScript
const mySwiper = new Swiper('.swiper', {
	direction: 'vertical',
	navigation: {
		nextEl: '.swiper-button-next',
		prevEl: '.swiper-button-prev',
	},
	pagination: {
		el: '.swiper-pagination',
		type: 'bullets',
		clickable: true
	},
	scrollbar: {
		el: '.swiper-scrollbar',
		draggable: true,
	}
});direction: 'vertical'で縦方向(上下)に移動します。
この時、ページネーションはtypeがbullets、progressbarの場合は自動で縦向きになります。fraction、customは横向きと同じ位置に表示されます。
スクロールバーも自動で縦向きに。
前・次スライドボタンは横向きのまま。
でも上下に移動するんだから、前・次スライドボタンも上下配置の方がいい気がする。
というわけでやってみた。
Sample. 6-2
※HTMLはSample.4、JavaScriptはSample.6-1と同じ、CSSはSample.1-1に下記を追加
CSS
/* 前・次スライドボタン共通スタイル */
.swiper-button-prev, .swiper-button-next {
	transform: rotate(90deg);	/* 元のボタンを90度回転 */
	margin: 0 auto;	/* 以下、横方向の中央配置用 */
	left: 50%;
	margin-left: -22px;
}
/* 前ページボタン */
.swiper-button-prev {
	top: 5px;		/* 上端からの距離 */
	bottom: auto;
}
/* 次ページボタン */
.swiper-button-next {
	bottom: 5px;	/* 下端からの距離 */
	top: auto;
}Sample. 6-3
※HTMLはSample.5、JavaScriptはSample.6-1と同じ、CSSはSample.1-1に下記を追加
CSS
/* Swiperの親要素 */
.swiper-parent {
	position: relative;
	height: 350px;	/* 全体の高さ:スライドの高さ(250px)+前・次ページボタンの高さ(50px×2) */
}
/* Swiper本体 */
.swiper {
	top: 50px;				/* スライドの上端を前ページボタンの高さの分だけ下げる */
	padding-right: 50px;	/* ページネーション・スクロールバー分の余白を右に取る */
	box-sizing: content-box;
}
/* 前・次スライドボタン共通スタイル */
.swiper-button-prev, .swiper-button-next {
	transform: rotate(90deg);	/* 元のボタンを90度回転 */
	margin: 0 auto;		/* 以下、スライド幅の中央配置用 */
	left: calc((100% - 50px) * 0.5);	/* 全ページネーション・スクロールバー(50px)を除く左右中央(=スライド幅の中央)に一旦配置 */
	margin-left: -22px;			/* ボタン幅の半分のネガティブマージンで左に少しずらす */
}
/* 前ページボタン */
.swiper-button-prev {
	top: 5px;		/* 上端からの距離 */
	bottom: auto;
}
/* 次ページボタン */
.swiper-button-next {
	bottom: 5px;	/* 下端からの距離 */
	top: auto;
}必要なカスタマイズを組み合わせて、お好きなデザインを作ってください~。


